Area rugs can be an excellent addition to any room. They add color, texture, and warmth to a space and help tie different room elements together. However, choosing and laying an area rug can be tricky, and people must correct some common mistakes. This article will discuss some of these mistakes and how to avoid them.
When installing rugs, we have already brought you the knowledge in a single awesome article a few months back. If you have missed that valuable article, you can read it by clicking the link below. Once you have read it, you may avoid choosing the size and laying your rug. However, we have mentioned the common mistakes that every homeowner makes when laying a rug.
Faber Rug has provided premium carpets and expert installation for any home or office in New England, United States, for generations. If you are not confident about choosing and laying your area rug correctly to improve the style of your home or don’t have time to do these things, feel free to obtain the hassle-free services of Faber Rug store at 19 Central Street, Wellesley, MA 02482. Our installers will assist our clients with rug installation services. The Faber team is responsible for moving your furniture, removal of the old carpet, and installing your new carpet. Also, you can shop for thousands of rugs in different categories at our store. Visit us to solve any rug matters. We are the one-stop solution for quality carpets and installation throughout New England.
Our experts never make the following mistakes, from choosing the best rug to finalizing the installation. Keep going through the article and ensure you are doing everything right. Good luck.
One of the most common mistakes people make when choosing an area rug is selecting the wrong size. A rug that is too small can make a room look disjointed and awkward, while a rug that is too large can overwhelm a space and make it feel crowded.
To avoid this mistake, measure your room and consider the placement of your furniture. A good rule of thumb is to choose a rug that is large enough to fit all your furniture or at least large enough to anchor the main seating area. If you have a smaller space, a rug that is just slightly larger than your furniture can work well.
However, the correct rug size depends on where you want to lay your carpet. Here is some good news! We have many articles that describe the correct way of choosing the correct rug size for each area of your home. Some may have read them, if not remember, you still can! Click the suitable link below, read the article, and please follow along.
How to pick the best Hallway runner rugs
Incredible tips for selecting the best kitchen rugs
Baby-Safe Rugs: Choosing Soft and Non-Toxic Options for Your Little One’s Space
Decorating your modern home with a vintage rug
Decorating a bedroom with rugs
The articles mentioned above discuss different moments and times when homeowners need help choosing the correct rug size. Review the best-fitting article for you. It will be beneficial for you. If you need further assistance, feel free to contact us anytime.

Another mistake people must correct is choosing the correct material for their rug. Different materials have different textures, durability, and maintenance requirements, so choosing the right one is essential.
For example, if you have kids or pets, a rug made of natural fibers may be the best fit. This was written about earlier. We have displayed the link below so you can easily review the article right away.
Baby-Safe Rugs: Choosing Soft and Non-Toxic Options for Your Little One’s Space
On the other hand, if you want a luxurious feel, a thread or silk rug may be a better choice. Also, choosing a handmade Indian rug will do the work perfectly. Read the following 2 articles that describe why you should buy an Indian rug for your home. At Faber Rug store, we have the highest quality Indian rugs with different styles to fit your need. Please call us directly if you need further help or have any inquiries.

When choosing an area rug, it’s essential to consider the overall style of your room. A carpet that clashes with the rest of your decor can be distracting and make the space feel disjointed.
To avoid this mistake, choose a rug that complements the colors and patterns in your room. If you have a lot of bold patterns or colors, a solid-colored rug can help to balance the space. A patterned rug can add interest and texture if you have a more neutral room.
Once you have chosen the perfect rug, it’s important to lay it correctly. Placing the carpet in the right spot can make the room feel balanced and comfortable.
A common mistake is placing the rug too close to the wall. Instead, try to leave a few inches of space between the rug and the wall to create a visual border around the room. If you have a smaller rug, consider placing it under a coffee table or furniture to anchor the space.
Finally, many people need to use a rug pad. Rug pads help to prevent the rug from slipping and sliding and can also help to protect your floors from scratches and wear. Make sure to choose a rug pad slightly smaller than your rug, about one and a half inches smaller all the way around and consider using a pad with extra cushioning for added comfort.
In one of our previous articles, we explained about buying the correct rug pad. Click on the link below and review the article for further clarification.
Stay in touch with our blog and keep your rug knowledge updated. If you have any questions about buying a rug for your home, contact us immediately. Our experts are always ready to assist you with choosing the best rug, measuring it, and installing it.
Please E-mail us any questions you may have:- contact@faberrug.com
Shop at our store:-19 Central Street, Wellesley, MA 02482
Call us:- (781) 235-5996
We have discussed decorating your living room, entryways, and open areas with rugs. Today, we will talk about how we are decorating your home’s bedrooms with rugs. We will introduce the most bright bedroom rug ideas. So, you can use them to decorate your bedroom to give you the best experience.
Decorating your bedroom with rugs may require focusing on colors, size, and designs. You can refer to our previous blogs, which help you select rugs according to size, techniques, and strategies.
Related: How to select the best living room rugs / Tips to decorate your house with beige rugs / Amazing rugs for the living room ideas / Everything you need to know about the best types of rugs
In the blogs mentioned above, we have discussed a lot about different rug matters. However, this is the first time we will talk about bedroom rug ideas.
A rug helps to set the tone for the whole space. But choosing the right carpet depends on the room you are decorating. Architects and interior designers explain how to choose the perfect rug for each space in your home.
Let’s first identify the features of the living room and bedroom rugs separately.
The living room is where you can weave fabric with a noisy personality.
In the living room, you can do anything. That’s where you can have a bold pattern.
A rug helps to set the tone for the whole space. But choosing the right carpet depends on the room you are decorating. Architects and interior designers explain how to choose the perfect rug for each space in your home.
Living room rugs are not only something used to introduce color, texture, and pattern but also something used effectively as part of your room layout by adding a structure that helps your furniture feel basic.
Let’s first identify the features of the living room and bedroom rugs separately.
Living room rug ideas can be as minimal or maximum as your scheme, but regardless, they play an essential role in designing your space.
The living room is where you can weave fabric with a noisy personality. That’s where you can have a bold pattern.
Living rooms usually have beautiful floors, be it wood or tile, so avoid carpeting from wall to wall. The rug should be small enough to show at least a floor cut.
The main difference between bedroom rug ideas Vs. The living room rug idea is that you can do anything in the living room. But in the bedroom, you must establish the room as your quiet, peaceful retreat.
If your living room is crowded, go for a rug with fur trim. Wool is more effortless to clean than silk, cotton, or nylon, and dirt under cut pile rugs is easier to remove than loop carpets (which can be prone to stubborn dirt).
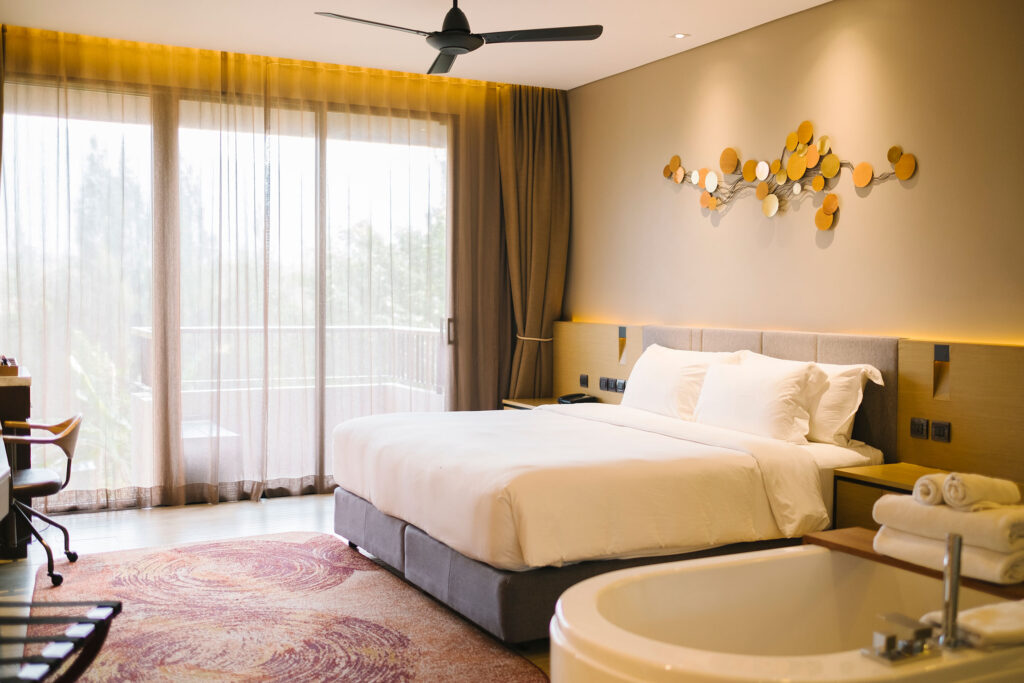
Bedroom rug ideas are the ideal manner to bring enthusiasm and softness to relaxing spaces. Bedrooms with hard floors can be prone to cold, but the right rug can also help bring instant comfort under the feet and cushion sounds.
As well to the functional benefits, rugs and runners are an excellent way to inject personality. As personal and private spaces, our bedrooms must reflect our tastes and preferences where we like to be – adding rugs is an excellent way to achieve this, as they are available in unlimited colors, textures, materials, and patterns.
Choosing perfect bedroom rug ideas is fun because there are so many designs. Laying small piles of rugs beside the bed will make a bright bedroom floor to bring warmth under the feet. Alternatively, a rug with extensive features can instantly change the look and feel of a room. Depending on the size and positioning, they can be used to integrate or zone the space instead of the bedroom carpet idea and can be a great starting point for room design.
One of the best places to start when inviting colors and patterns into a home is to set the tone and anchor the rest of the space. You can give a pallet or soundboard for the rest of the room with a nice bedroom rug. You can choose specific colors from the fabric and apply them to the walls, soft furnishings, and even the ceiling to give it a dramatic look.
Take a look at the following bedroom rug ideas to decorate your home with an authentic look with a cozy, soft, and mind-blowing floor. Please pay attention When selecting the mentioned rugs to obtain their best quality. Apart from the design, sometimes the quality of the material matters on any occasion.
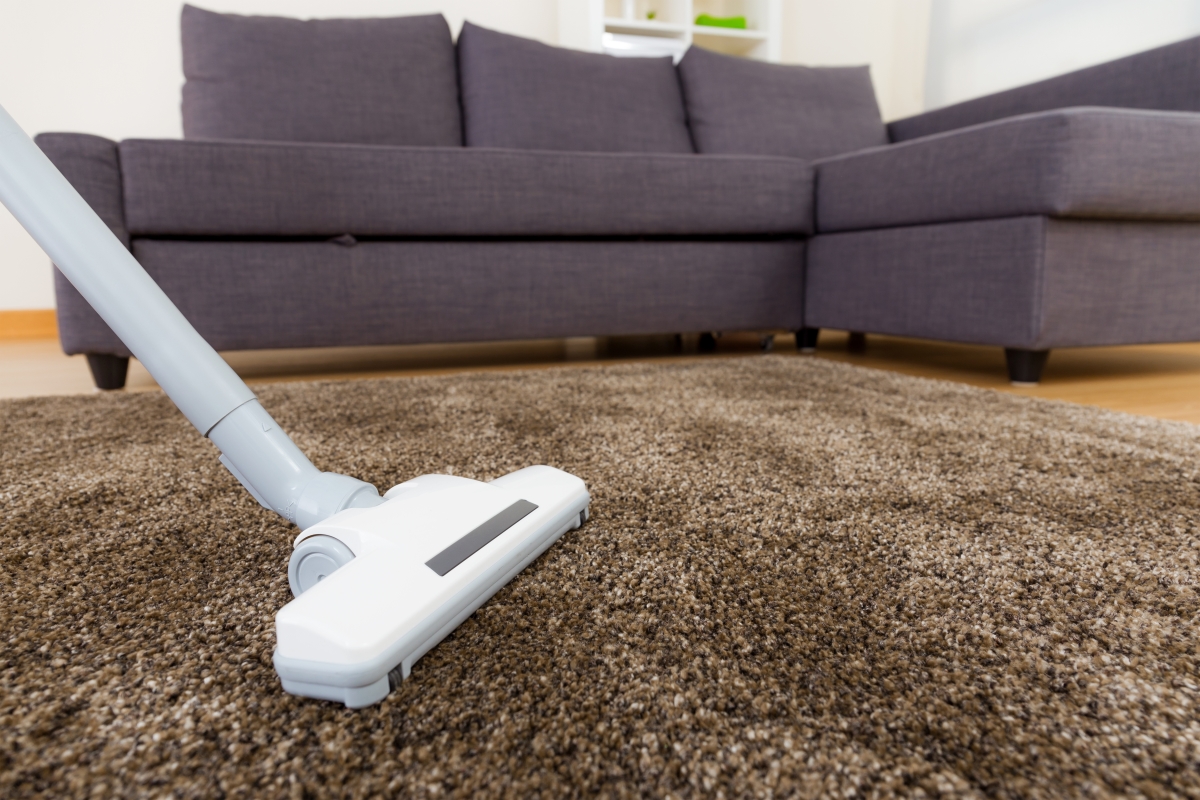
The most significant advantage of a flat woven rug is the thin line nature of the fabric. Because these rugs are made of two woven yarns, they are very lightweight, so you can easily position your rug in any shape you choose. Flat weave rugs are also often reversible, and because of the technology used to weave them, you can practice a rotation to keep your rugs looking their best. When it comes to maintenance, flat-woven rugs are naturally the most accessible type of rug to clean and vacuum due to their flat properties.
They can be an aesthetically clean, serene, neutral addition to your home, adding a soft touch to children’s rooms, living spaces, and anywhere in between. However, many people see white rugs and find it confusing to clean. We get it! If left untreated, white and cream rugs can stain over time. However, white rugs are not a bad idea. We promise. Many of our favorite places have white or cream rugs. If you are more worried about your things getting dirty, we have some tips to keep them clean.
First: Consider bringing them to low-traffic areas of your home, such as an office or bedroom. This way, they are less likely to get stains from dirty shoes or an unexpected leak.
If you like warm colors and patterns but are careful about using them wall-to-wall, introducing them through fabrics, soft furnishings, and rugs can be a good option. Adding a colorful geometric rug is an easy, bright bedroom idea, as this interior proves that a neutral scheme can come to life instantly.
Choose an oriental or a Persian rug to decorate your bedroom without hesitation.
Among the traditional types of rugs, Persian rugs and oriental rugs are the most popular. Persian rugs are characterized by delicate embroidery and oriental designs. It is considered to be more expensive than other traditional rugs because of the hard work it takes. Persian carpet patterns are hand-woven and woven to perfection using techniques that date back thousands of years.
Laying a giant, the room-sized rug will give the room a ‘wide-open feel, covering most of the floor surface area, making it work well in rooms with high ceilings or ceilings. To do this, measure your bedroom’s total length and width, subtract one to two feet (12-24 inches) from those dimensions, and buy a rug in the area closest to the size you have calculated.
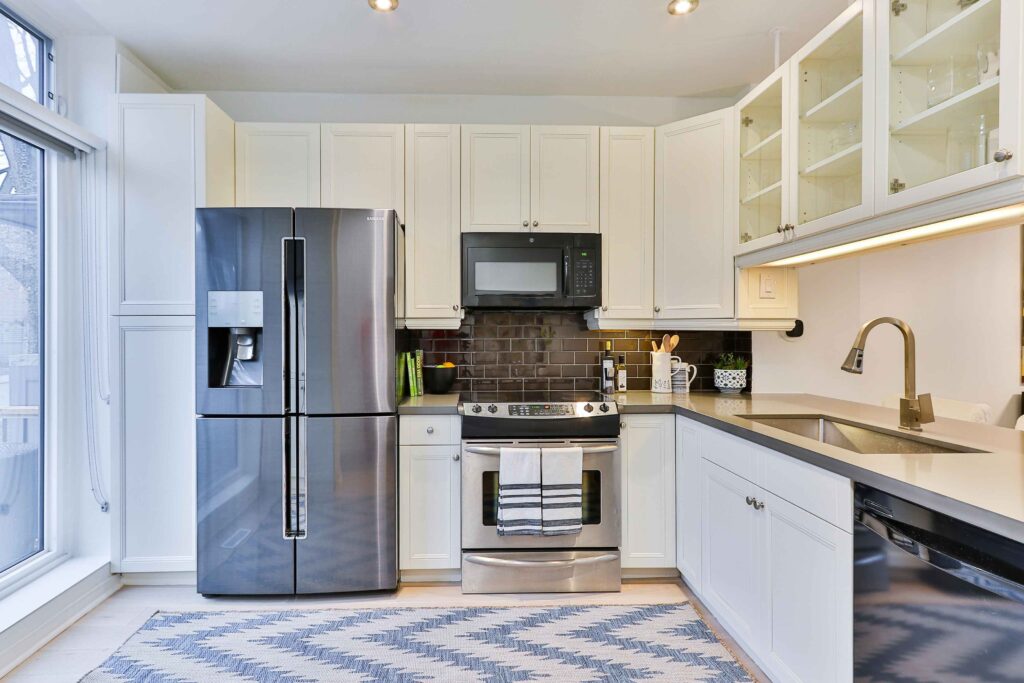
We have come across many blogs explaining the concerns when buying a rug for your home. Also, we have discussed them all together and sometimes separately. You can read them easily by visiting our blog. There you can find how to select a rug for your living room, bedroom, hallway, etc. So, today the article will explain a missing thing but more important than any others since kitchen rugs are something special. Otherwise, choosing a rug for the kitchen has so many concerns. However, a rug lover might need a perfect rug in the kitchen before starting using the kitchen. The reason is the unusual behavior seen in a kitchen rather than in other places. So, let’s begin the discussion.
You will feel weird when you read the above subtopic. But here, there is something to learn. Mainly the purpose. Understanding the intention of your rug is better than trying different rugs several times and changing.
An area rug in the kitchen would be helpful to reduce the noise in the kitchen. While the other objects like tiles, floors, and windows improve the noises, rugs can absorb them. Apart from that kitchen is also a place where you should work comfortably, and the family members should feel an ultra-beautiful feeling.
The rug should protect against slipping due to high foot traffic in the kitchen. So, kitchen rugs are used to cover the kitchen floor but also to provide comfort, protection, and beauty. So, when constructing rugs for the kitchen, makers focus on those things and use different materials. You have to be aware of those materials for choosing the perfect one. So, let’s discuss the materials in those rugs.
Rugs introduced as indoor-outdoor rugs (usually made of polypropylene) are a good choice because the fibers don’t absorb spills. Cotton or a blend can also be a good choice for small rugs you can put in your washing machine. Natural fibers like sisal or jute are durable and can sometimes be cleaned of stains, while wool is an easy-to-spot natural weave, but each requires more care than a polypropylene rug. Read the care instructions given by your dealer before buying a rug to ensure you’re willing to put in the effort.
Nylon: Nylon is the best synthetic material for rugs and is suitable for the kitchen. Due to its strong and durable features for high footfall and easy to clean, it is also stain resistant and makes the best kitchen rug fiber for a busy space!
Polyester: Polyester is also resistant to fading and dries easily and quickly. It is resistant to water-based stains due to its low absorption level, but oil-based paints are tough to remove from polyester. It is artificial and usually mixed with other fibers but is close to wool in look and feel.
Polypropylene: This is an artificial fiber, but this is the most resistant to stains and wear. It’s very tough and can even be washed with a semi-bleach solution.
Seagrass: Seagrass is a beautiful natural fiber suitable for kitchen rugs. Unlike sisal or jute, it is exceptionally hard-wearing. It’s not soft material, but it’s perfect for a small decorative rug or runner.
Bamboo: Bamboo rugs are another durable natural fiber to take advantage of. It is tough, durable, and gives off a beautiful shine. These rugs are responsibly harvested and provide a beautiful finished product.
The materials mentioned above are the best choices for kitchen rugs of their accessible clean, durability, and foot-resistant features. However, it isn’t enough considering the material; we should concern ourselves about the size, the backing(potential of slipping), and the decorating concerns. Let’s look at them.
The size of the rug you pick for the kitchen may depend on the area of the floor that you need to cover, the shape of the area you need to cover, and the style you prefer. Faber Rug Inc can cut and bind any size rug you need. We can measure and figure out the perfect size carpet for your kitchen.
Ideal and popular sizes of kitchen rugs include traditional runners (2.5 x 8 or 12 feet), 2×3, 4×6, and 5×8. Includes traditional runners (2.5 x 8 or 12 feet), 2×3, 4×6 and 5×8.
Regardless of the size and shape of your kitchen, the space in front of the kitchen sink is the best, most functional place for your kitchen rug. That’s where we’ll be standing for long periods, so the extra cushion there really helps.
Large kitchens:- If you have over 200 square feet of a large kitchen, think about placing a runner rug above 5’x7 ′, ‘3×5’. If your kitchen is shaped like an island, you can place two rugs on either side.
More tips
Medium kitchens:- Choose a small rug when the place is medium in size. According to your kitchen layout, a smaller rug such as a 5’x7′, 3’x5′, or 2.5’x7′ kitchen runner may work well and save floor space. Open.
More tips
Small kitchens:- A small kitchen can quickly feel cluttered, and adding a rug and pattern can add to it. However, the correct type of rug can add warmth and personality to an otherwise utilitarian space. If you decide to add a rug, choose a small 2’x3′ or 3’x5′ rug or a short kitchen runner like 2.5’x7′, and place it in front of the sink.
Water, oil, or grease tend to make the kitchen slippery. To keep your rug from slipping and your feet comfortable during prep work, find a good rug pad with a backing that adds some spring but doesn’t slip on it.
When it comes to covering the floor of your kitchen where you prepare food for your loved ones, color is important. Make sure you pick a color that you like that is consistent with your kitchen’s overall color scheme and design.
Ideally, it would be okay if you did not choose a light-colored rug for your kitchen, as these tend to deliver stains more quickly and start to look dirty.
If your entire kitchen is on a light-colored floor, you can have a dark-colored multi-colored rug that still fits well with the rest of the decor.
Every rug lover has multiple choices. One can love traditional rugs, another one loves modern styles, and some are in love with Persian and oriental rugs. But, only a few of them care about the material and process. Only a palm-full of people know how to make a rug or how it is processed. If one who doesn’t care is reading this, he might ignore “why is it important to know how a rug is made?” and just enough if we can buy it from the shop. If you don’t mind, it is better to know the hidden story of everything you like than just observing and taking decisions. So go through this article, learn how to make a rug, and think about the next story when choosing a carpet.
Rug-making started a long time ago. If you refer to our previous blog on the history of rugs, you can get an obvious idea. However, there are four different methods of constructing rugs so far. Let me introduce them to you.
How do you think this started? No doubts. You will answer hands. Yes. Handmade rugs were the first and the foundation for the rug industry in the world. So, the very first method of rug making is hand-knotting.
This old technology has been used for over 1000 years. These rugs, made famous by Turkish and Persian artisans, are woven into sheer fabrics. The rugs are made by knotting the yarn crosswise (threads on the carpet vertically) and tightly wrapped around a wooden or metal frame (loom).
The Knotting process is prolonged and requires years of training and experience. The average weaver can knit about 10,000 knots a day. The leading carpet makers are artists in the true sense of the word, and their work should be treated the same way.
This technique uses a tufting gun that speeds up the rug-making process. This makes it easier to create hand-tufted rugs than other handmade or slow-moving techniques. On the other hand, manufacturers can quickly produce the highest quality hand-tufted rugs compared to other handmade methods.
This technology was developed as an alternative to hand rugs which greatly accelerates the production of rugs. First, the design is stencilled into a piece of canvas that is tightly stretched across a frame. Then, using a tufting gun, the thread is sent across the canvas into a ‘V’ shape. Once the tufting is done, the rug is removed from the frame and glued to the back to hide the tufting end. They are cheaper than their hand-tied cousins due to less labour and skill requirements.
In modern times, machine making has spread throughout the industry and is perhaps the most accessible of the rug-making techniques. Machines capable of weaving, weaving, hooks and tufting can produce handmade mattresses in a short period of time.
The fastest and most efficient method of making rugs using the latest machinery and technology, machine-made rugs are built through thousands of reels fed into one giant mechanical loom that can be quickly carpeted to the selected pattern. Although there are limits to the amount of color used on one rug (usually 8-10 colors), several rugs can be made at once. Machine-made rugs are affordable and of high quality and service, making them an affordable luxury item in your home.
Produces rugs without the need for the fabric to build a flat weave. These are the pattern and foundation of a carpet, and since they have no backing, you can use either side when you lay them down. Classifying them as flat results from their lack of piles and smooth texture, which also contributes to their durability. Automatic loom machines can create a variety of intricate patterns with precision through the application of computer-aided design technology. The machines minimize the possible defects in the carpet as a result.
For this technique, you will need a sewing machine. Built on a two-layer structure of vertical threads, the rugmaker places a horizontal weave between the upper and lower battle plates. The canopy has a movable front part called a beater, which pulls the fabric maker towards the growing carpet to press each extra line of the weft. This way, no large blanks could damage the fabric’s integrity once it is finished.
If the professional changes the process slightly, the flat canopy may have a more stacked surface. The yarn is piled up by placing a tube or rod between the two looms. The rug makers then made alternate rods and weaved them on the rug, and once they were finished, they could be left alone, or the loops could be cut.
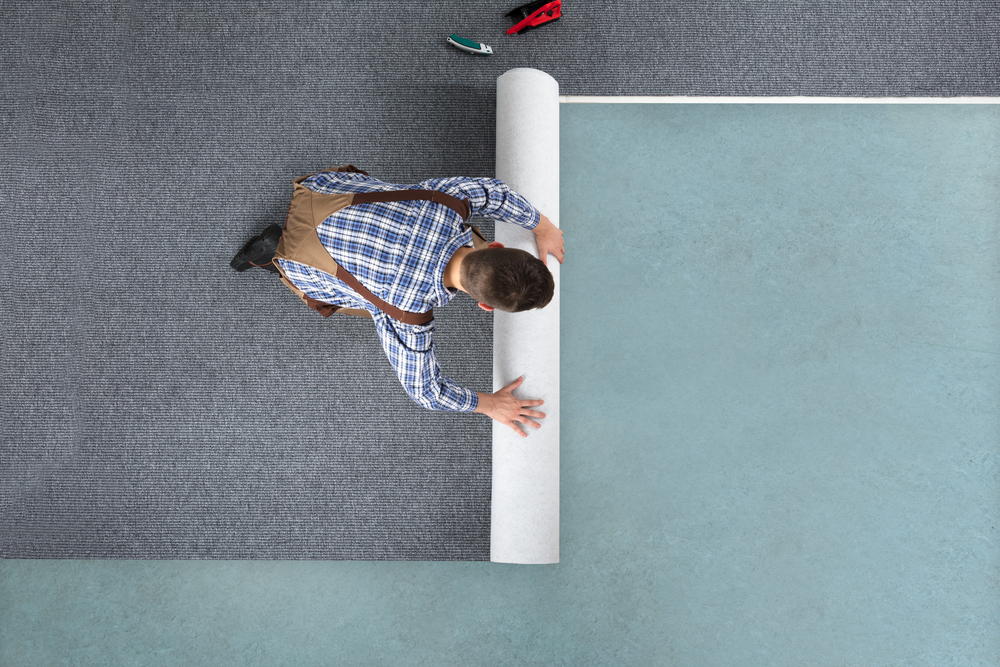
Choosing a carpet can be a fun and exciting task. But carpet installation is can be difficult and not always easy. That is why it is better to choose an experienced person or a company.
Carpets are not cheap, so you need to hire a professional if you are unsure how to install them properly. Professional carpet installers are good at how to properly install the different construction of carpets.
A skilled and experienced service provider will take a number of steps to complete the task. However, choosing the right carpet for your purpose is entirely in your hand. Refer to our previous blog about selecting the best rug for your home. But, a customer-friendly service provider, like the staff at Faber Rug Co. will help you with the process. If you need to do this yourself, this guide will ultimately help you do things alone.
Here are the next steps.
Carpet removing is also a step-by-step process. This should be done very carefully to ensure that the floor for the new carpet is smooth and not damaged.
If you do not entrust the job to an experienced person or team, you will need to inspect the floors and fix any problems before installing a new carpet or floor.
Carpet installation is a way to enhance the atmosphere of a room. At the same time, they offer comfort undoubtedly. However, laying a pad may improve comfort.
Next, the old carpet cushion will be removed and replaced with the new carpet padding, making a big difference in the feeling and functionality of your new carpet. There are various types of pad. Rubber is the softest and a little bouncy, Bonded is another type contractors use in new home but it loses its density quickly and can leave you feeling the carpet not being as soft as it originally felt. The best choice Faber Rug recommends is Nova pad which is dense and will last a long time. Its firm and will enhance the feel of your carpet and the life expectancy.
To properly install here are a few steps to follow.
It is best to use a good quality, domestic metal tape to do this job well. Measure the lengths and breadths and calculate the area. Then cut the piece of the underlying pad to fit the surface perfectly. The pad should fit exactly from one tack strip to the next. Pad usually comes in 6′ widths. You will lay a series of breaths to cover the floor and use a utility knife to cut the pad close tot he tack strip not leaving any gaps. If its being installed on a wood floor then staples can be used to secure it to the floor. If the floor is concrete then it may be glued down.
Before you begin, you should do a series of checks on the area where you will lay the carpet floor. First, make sure the surface is clean. If there is excess dust, you can use a vacuum cleaner and be sure to remove nails or small objects that have stuck to the surface.
If you can, temporarily extract the doors from their frames, this will speed up your work, but do not force it if circumstances do not allow you to do so. Often when replacing your carpet with a new one doors may need to be shaved on the bottom in order for them to close properly. Take this into consideration when picking your new carpet. You may need a contractor to trim your doors if you or the installers dont perform this task.
The tackle bar creates a carpeted frame. When placing the strip, make sure the pins face the wall. Position and nail it to the floor depending on the thickness of the carpet. For concrete floors, use glue.
It seems simple, but be sure not to rush things. Laying your carpet and floor in the wrong way will create a crooked carpet. First, observe the direction of the floorboards and adjust the angles below as you place them.
The carpet pieces should be larger than the relevant room in a small amount, covering up to six inches. This cover cutting can be tricky, and it is imperative to cut it correctly when replacing the carpet. Experienced installers accomplish it precisely the first time, and the new carpet will prevent wastage or damage. This should be planned when you are measuring for carpet installation.
Grab a Pencil and a paper. Then sketch the area where you are going to lay the carpet. No need for a perfect diagram, but you will need accurate measurements.
Now measure all the lengths and width tape and write down your dimensions on your diagram.
Calculate the area (length*width) and buy the necessary size of carpet. Some store sell it by the square foot or square yard.
Note:- Remember to keep additional lengths for the seams (six inches)unless you need to match a pattern then you may need more carpet.
Lay the new carpet on the padding. It’s really simple. But, the hardest part is coming up.
Most rooms require more than one piece of carpet to cover the room. The popular way to do this is to cut the carpet from wall to wall to ensure that the pattern fits correctly. The carpet is cut with great precision, so the pattern is straight on the wall.
Seaming tape is used to join two piece of carpet together in a room that is larger than the width of the carpet chosen. You use a carpet iron to heat the tape that has glue on it and it connects the two piece of carpet together on the backing. Some carpets need to be sealed on the edge first before the seam can be made as not to unravel.
To finish the installation, first, stretch the carpet using a “knee kicker” and then spread the carpet along each wall to attach to the tack strip and tuck the carpet between the baseboard and the tack strip. Trim the carpet close but leave enough to tuck in with a chisel.
New carpets and rug padding, or carpet cushions, feel luxurious and satisfying. It is a gift for your feet and can express your family’s personality and lifestyle. Luxury designs can give you performance and value whatever carpet you want. So, it is better to go to a new carpet installation when your rugs are old and don’t look or perform like they used to.
Now enjoy your new carpet and relax, installation is hard work.
Rugs and carpets are an essential part of flooring worldwide. They add cushion, ascetics, and warmth. Synthetic carpet is not a natural fiber. Please read on to lean more about synthetic rugs and carpet characteristics.
All carpets are not made with the same techniques. Also, they use different materials according to the place it will be spread. Further, the manufacturing method of the Carpet also depends on the type of material.
Basically, carpets are a textile product and a rich floor covering. They consist of two layers. The top layer attached to the pre-woven bottom layer is called the “pile”. According to the different materials they have made, carpets have different classifications. Carpets are usually wool, jute or synthetic fiber.
Carpets made of synthetic fiber are Synthetic Carpets. Worldwide production happens using a variety of chemical compounds, including polyester, nylon, and polypropylene. Also, machine loom technology is essential to make these carpets.
Also, there are a few categories of Synthetic Carpets in the market.
These carpets deliver considerable advantages for the users.
Now, you know what the benefits of Synthetic carpet are. Wool is also a better option in carpet and rug decisions. Let’s see what the pros and cons of wool carpets are.
